
X app
Create an X developer app with OAuth 2.0 so Bulkit can post to X accounts.
You need an X account with developer access. Read How platform apps work first if this is your first app.
Open your app
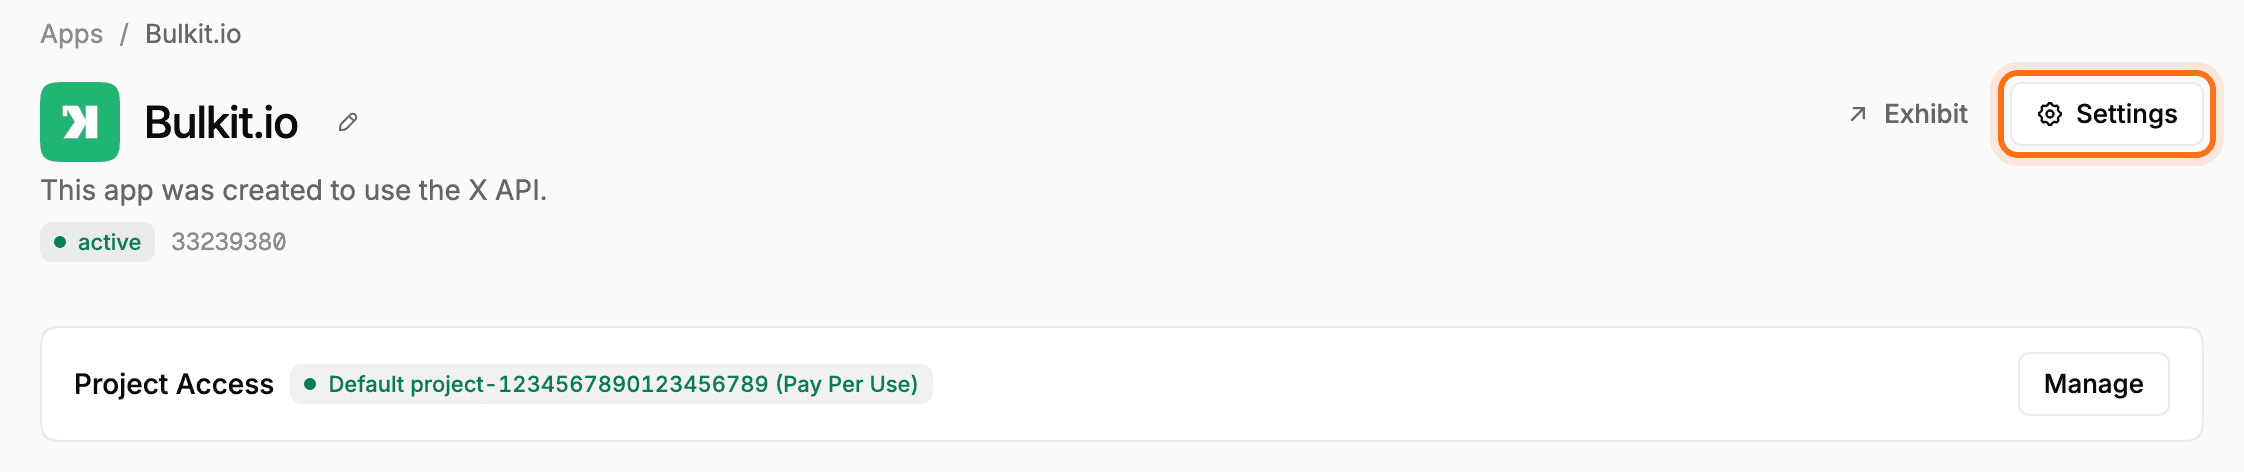
Go to the X Developer Console and sign in. Open Apps, then your app (or create one). Click Settings at the top right.
Set up authentication
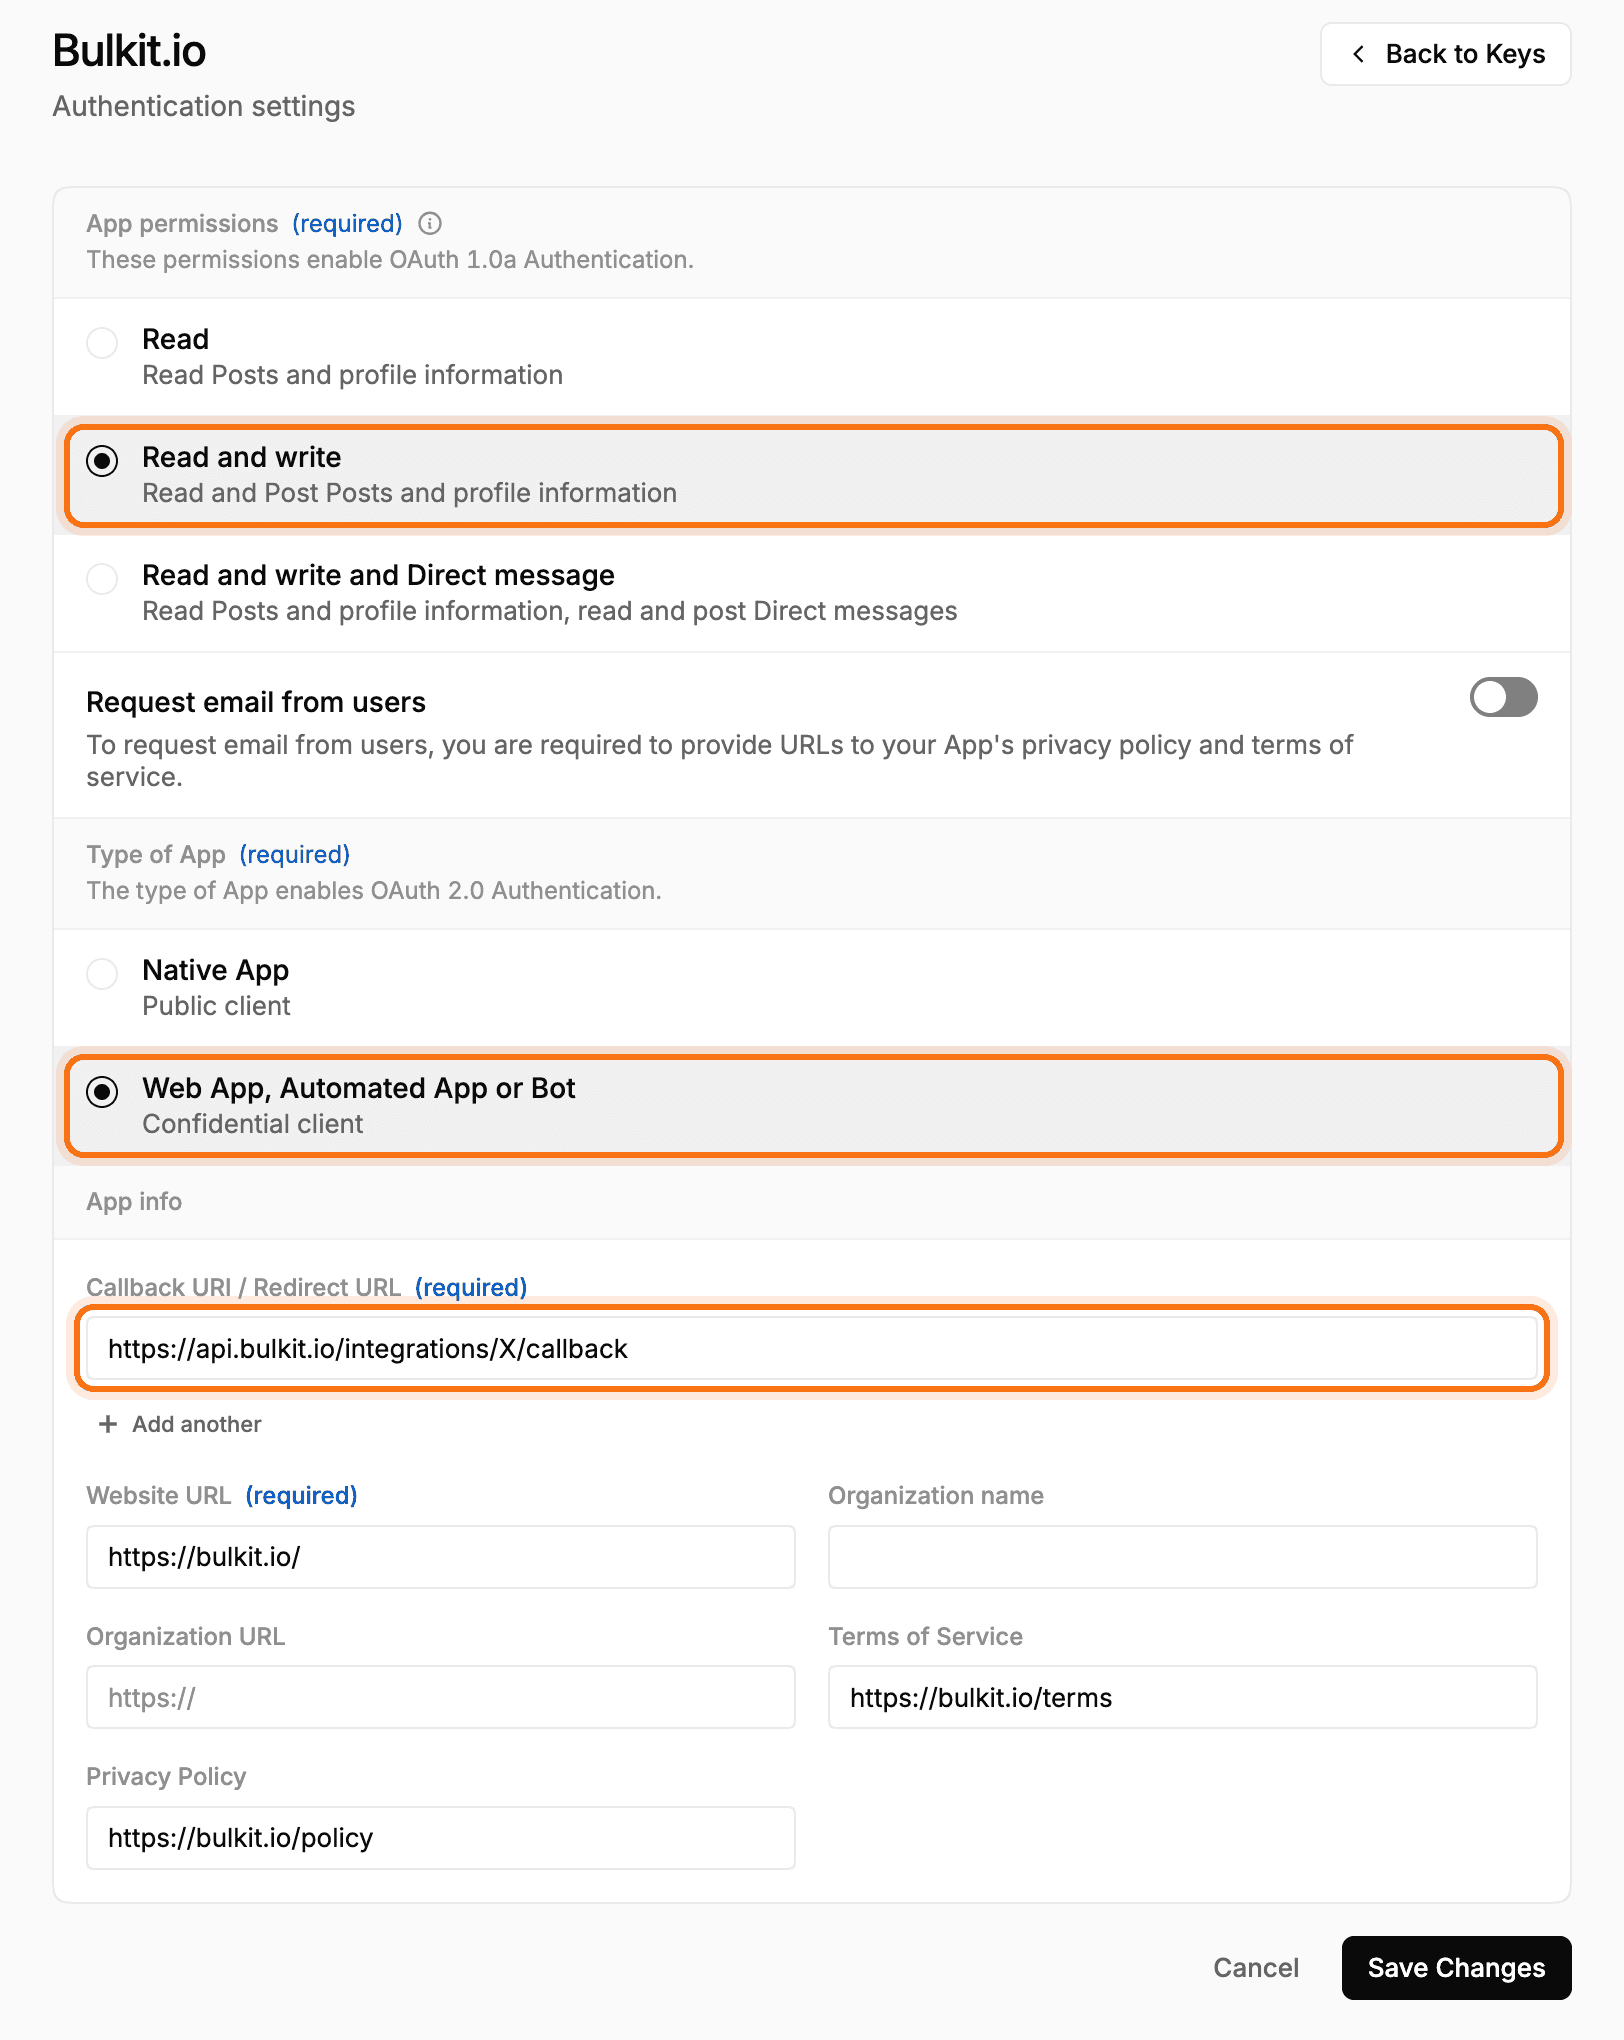
Fill in:
- App permissions: Read and write.
- Type of App: Web App, Automated App or Bot.
- Callback URI / Redirect URL: the redirect URI from Bulkit, like
https://api.bulkit.io/integrations/X/callback. - Website URL: your website.
Click Save Changes.
Read and write
With Read only, X lets you connect but refuses every post. If you change this later, reconnect your accounts so they get the new permission.
Copy the keys into Bulkit
Back on the app page, under Keys & Tokens → OAuth 2.0 Keys, copy the Client ID and Client Secret. X shows the secret only once; click Regenerate if you lost it.
Paste them into Channels → Platform apps → X in Bulkit and save.
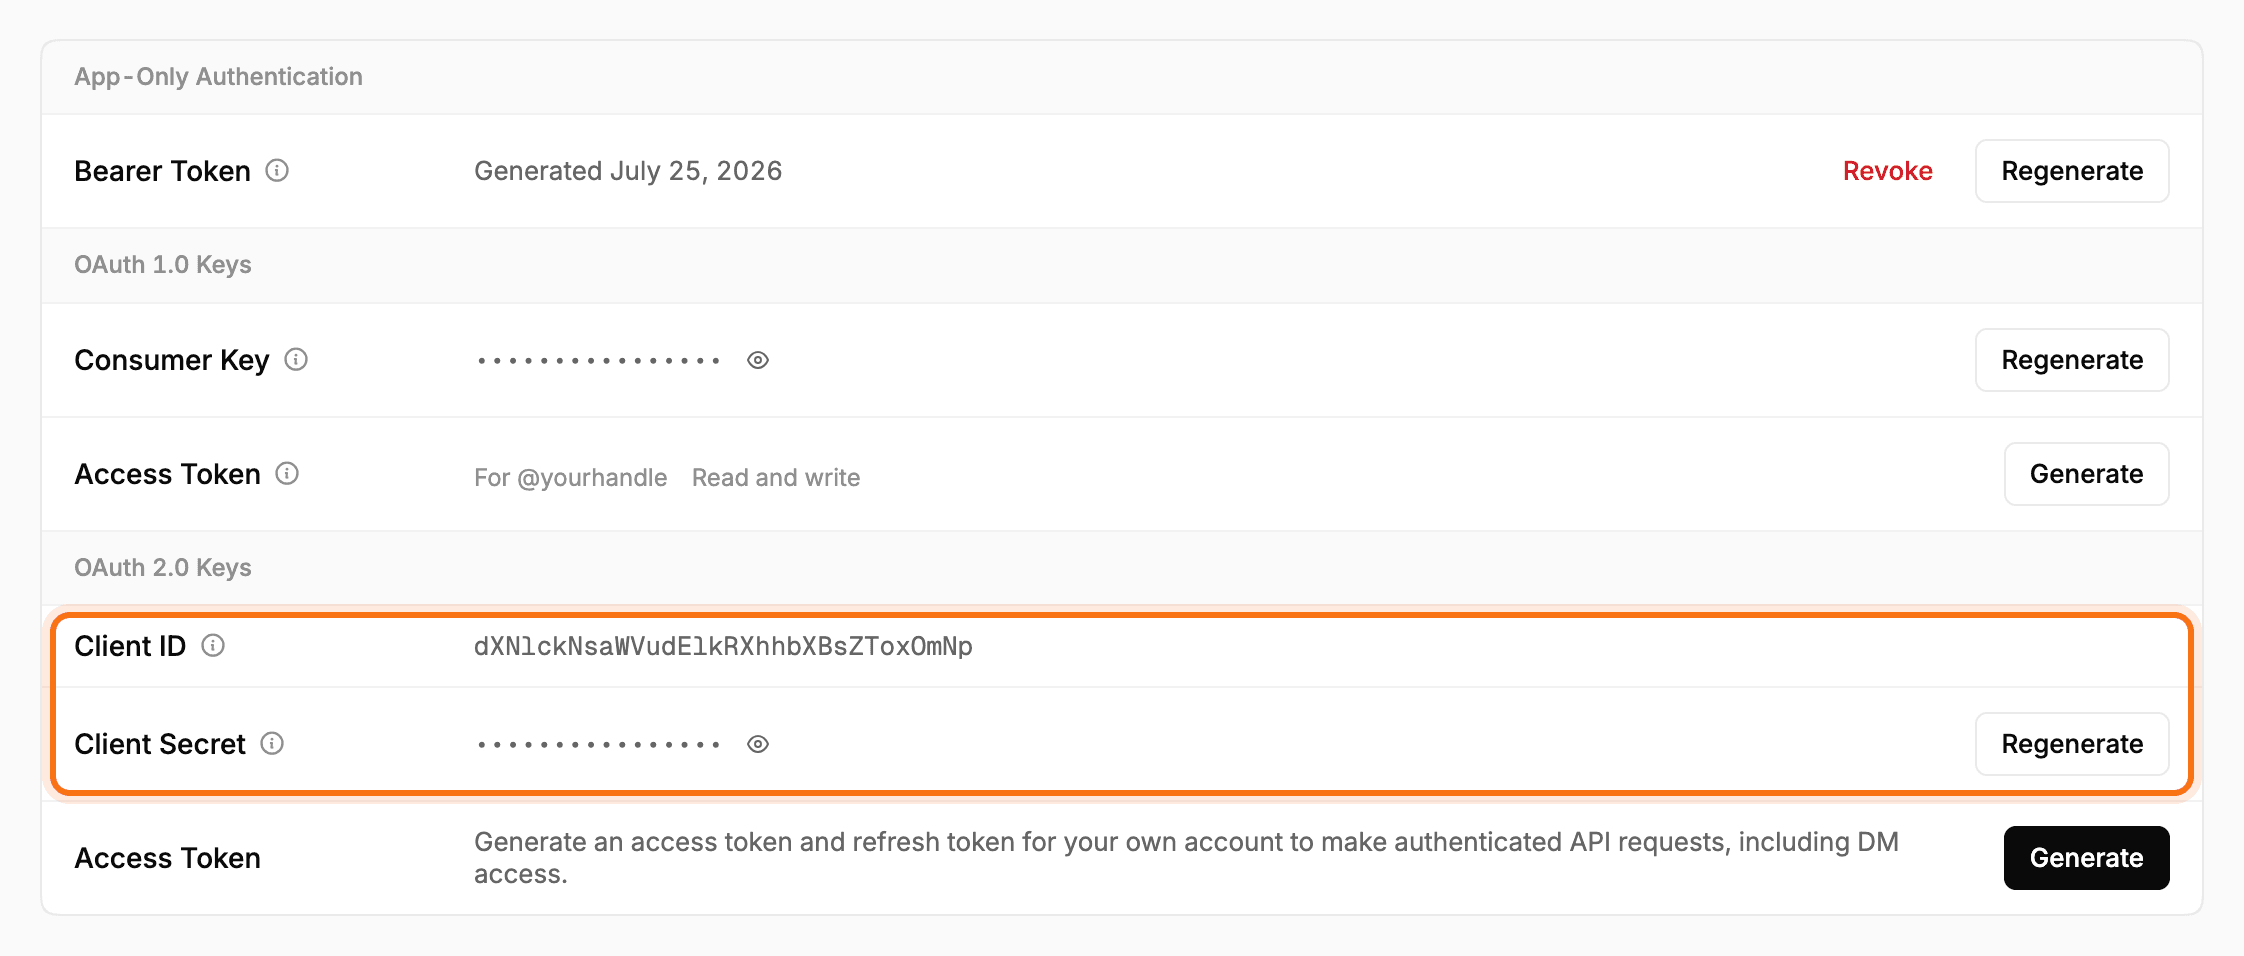
Use the OAuth 2.0 keys. The Bearer Token and the OAuth 1.0 keys on the same tab don't work here.
Connect an account
In Bulkit, open Channels → Accounts → Connect account → X, log in and click Authorize app.
Before you post
X has no review step: any account can connect as soon as the app is saved. But the X API is pay per use. Each post costs credits, so add some under Billing → Credits in the Developer Console, or posts fail.